Culinary Technology

|
A big portion of your grade for this module will be based on how well you follow your recipe, how well you behave in the kitchen area, and how well you are able to clean up after yourselves.
|
CLASS #1 - Planning
The first thing your group will need to do is decide what you're going to make. You have the following FIVE choices. Feel free to watch the videos below.
|
1. Brownies
|
2. Chocolate Chunk Cookies
|
|
|
|
|
3. Monkey Bread
|
4. Cupcakes
|
|
|
|
5. Pizza
|
|
Once you have decided what you're going to make, you need to start creating a PowerPoint slideshow in Office 365. If you need help logging into Office 365, ask Mr. Locke. Do NOT use the version of PowerPoint that you might see on your computer's desktop.
Your first slide will be a title slide. It will say what you're going to make and it will eventually include a picture of your finished product.
The second slide is where you'll put your list of ingredients. List everything that you will need in order to make what you've chosen.
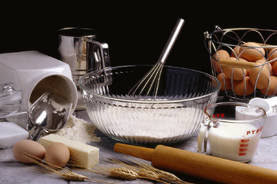
As you list the ingredients, you will need to make a list of the different things that you may need to bring for your next Tech class. We will generally have the following ingredients here, in the kitchen area, that you will be able to use. But you should still double-check and make sure that we actually have them in stock. I make no guarantees.
-Cooking Spray -Vanilla Extract
-Cooking Oil -Baking Soda
-Flour -Baking Powder
-Cupcake Cups -Salt
-Cocoa Powder -Sugar
-Butter -Brown Sugar
*This means that if your recipe calls for milk, you may need to bring in a cup or two of it. Or, if your recipe calls for eggs, you'll need to bring in your own.
For the rest of your PowerPoint, you will outline each of the steps in your recipe. Each step of the recipe will be on its own slide. You need to write whatever the step is and then leave a space for a picture.
Your first slide will be a title slide. It will say what you're going to make and it will eventually include a picture of your finished product.
The second slide is where you'll put your list of ingredients. List everything that you will need in order to make what you've chosen.
As you list the ingredients, you will need to make a list of the different things that you may need to bring for your next Tech class. We will generally have the following ingredients here, in the kitchen area, that you will be able to use. But you should still double-check and make sure that we actually have them in stock. I make no guarantees.
-Cooking Spray -Vanilla Extract
-Cooking Oil -Baking Soda
-Flour -Baking Powder
-Cupcake Cups -Salt
-Cocoa Powder -Sugar
-Butter -Brown Sugar
*This means that if your recipe calls for milk, you may need to bring in a cup or two of it. Or, if your recipe calls for eggs, you'll need to bring in your own.
For the rest of your PowerPoint, you will outline each of the steps in your recipe. Each step of the recipe will be on its own slide. You need to write whatever the step is and then leave a space for a picture.
CLASS #2 - Kitchen Time

|
DO NOT FORGET TO TURN THE OVEN OFF WHEN YOU ARE FINISHED WITH IT!
|
Now you will be permitted to spend a full class in the kitchen area, making whatever you've chosen. Do not make too much noise because that would be distracting to the other students (and me). If there's too much noise, you will be removed from the kitchen and that will be that.
Remember, part of your grade for this will come from your behaviour in the kitchen, how well you can follow your recipe and how well you can clean up after yourselves when you are finished. If any of those things don't go well, you will not be getting a 3 for this work.
Remember, part of your grade for this will come from your behaviour in the kitchen, how well you can follow your recipe and how well you can clean up after yourselves when you are finished. If any of those things don't go well, you will not be getting a 3 for this work.

|
Before you actually begin working your way through the recipe, ask Mr. Locke for a digital camera. It is YOUR responsibility to make sure that you actually do this.
You will need to take a picture of each step of the process. At the end of class, Mr. Locke will copy these pictures to your home folder. Then, during your next class, you will be putting the pictures into the PowerPoint that you have started. |
CLASS #3 - Finishing the PowerPoint
Now it's time to take the pictures you have taken and insert them into your PowerPoint. When you have finished your PowerPoint, show it to Mr. Locke. It should have a title slide that explains what you made (including a picture of your finished product). Then it should have a slide that lists the ingredients. And then, it should have a slide for each of the steps that are listed in the recipe. Each of those slides should explain the step and show a picture of you actually doing that step.

