Now that you've had some practice with programming your Micro:bit, it's time for you to actually make something.
Watch the video below and then you can get started with making your very own Micro:pet.
Watch the video below and then you can get started with making your very own Micro:pet.
|
|
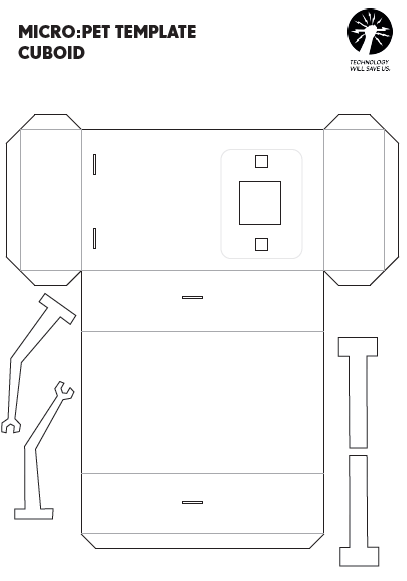
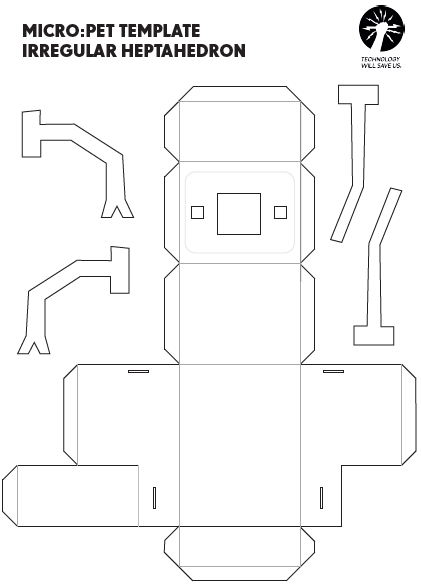
To get started with making your own Micro:pet, ask Mr. Locke for one of the templates below.
Now that you have your template, here are the steps you need to follow:
1. Decorate and colour it. Do NOT use markers unless you place something underneath your template first. Otherwise, the table is going to get marked up as well. Colouring pencils are your best bet.
2. Glue it onto card stock (Mr. Locke can provide you with a sheet of card stock).
3. Use an X-Acto knife to cut out the holes in your template (where the Micro:bit and the arms/legs will fit). The X-Acto knives are in a glass jar on Mr. Locke's desk. Also, make sure you place a blue cutting pad underneath to protect the table.
4. Cut out the rest of your template (using scissors).
5. Write your FIRST and LAST name on the back of the template.
6. Fold the body of your Micro:pet. However, do not actually tape or glue anything yet.
7. Click the button below to open up the Micro:bit coding site and then you can write the code for your Micro:pet. Be creative with your code. You can add code for when your Micro:pet shakes, tilts up, tilts down, etc. Maybe you can even hook up a buzzer to your Micro:pet to allow it to make sounds. It's all up to you!
8. Once you have completed the coding portion of the project, simply download the code to your Micro:bit and then attach a battery pack (you can get one from the blue bin on Mr. Locke's desk). The battery pack allows you to make your Micro:pet portable because you won't need the computer anymore.
9. Insert the Micro:bit and battery pack into your Micro:pet and then glue or tape the whole thing together. Now your creation will be complete and it'll be time to record your video.
10. When you have finished recording your video, you will need to disassemble your Micro:pet once again. You may keep the paper part (the part that you designed and folded). If you do not want to keep it, then please throw it out.


