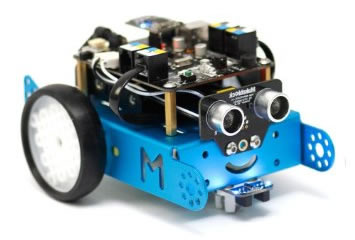
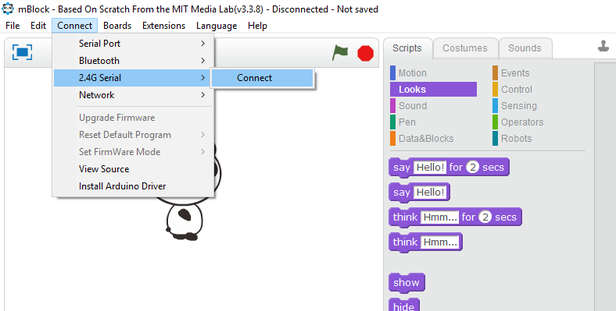
Plug the Wireless Serial Stick into one of your computer's USB ports. Then load the mBlock program (you should see the icon on your desktop).
Next, turn your mBot on. Can you find the power switch on the side?
Next, turn your mBot on. Can you find the power switch on the side?
Now you need to actually establish a connection between your mBot and the computer. See the screenshot below.
NOTE: You will need to go through this step whenever you start using the mBot and whenever you turn it off and on again.
Once you have successfully connected the mBot to the computer, you are ready to start programming it.
Once you have successfully connected the mBot to the computer, you are ready to start programming it.
Your main task for this stage (Stage 1) is to get the mBot to move around in response to different keys that you will be pushing on your keyboard.
Make your mBot do the following:
HINT: You will need to use these 4 blocks (and others too, of course).
Make your mBot do the following:
- Go forward when the up arrow is pressed
- Go backward when the down arrow is pressed
- Turn right when the right arrow is pressed
- Turn left when the left arrow is pressed
HINT: You will need to use these 4 blocks (and others too, of course).
|
Does your mBot veer to the left or right whenever it's supposed to be driving straight?
If so, don't worry about it. It's just because one of the mBot's motors may be a bit more powerful than the other. There are ways of fixing this through code and Mr. Locke can show you if you're interested. Otherwise, it's okay to just leave it alone and move on. |


